Metal-cpp Setup
Setting up Xcode for use with metal-cpp
In order to write Metal code, either for an iOS based device or MacOS, we're pretty much going to need Xcode. Development for Apple devices can be done in other editors, but it is not recommended, as Xcode is created by Apple specifically for development within its ecosystem. If you don't have it already, you can download it for free from the Mac App Store.
If you don't want to go through the metal-cpp or GLFW setup process, head on over to the GitHub and clone Lesson 0 where I've configured the project already. Otherwise, read on!
Metal is designed to be written in a programming language called Objective-C. Objective-C, along with Apple's Swift programming language, are the languages typically used to write macOS and iOS applications. In this tutorial series, however, we're going to be writing our application primarily in C++, as this is the industry standard for writing Computer Graphics related applications, whether it be for real-time rendering in video games, or for CAD software. I say "primarily" because we'll actually be using a bit of "Objective-C++", which allows us to mix Objective-C code with C++ to make things a little easier for us. Even though Metal is typically written in pure Objective-C, for convenience Apple has released a set of C++ bindings that act as an interface to the the Metal Graphics API, allowing us to write high-performance graphics and compute applications for Apple devices in (almost) pure C++. This wrapper is very light-weight, and acts as a one-to-one translation between the native Objective-C functions calls and C++. You're going to need to download the library here.
Once you have downloaded the metal-cpp library, open Xcode and Create a new Xcode project. For this tutorial we're going to be targetting Mac devices, so under the macOS templates, select Command Line Tool. This will set the default language to C++ and give us an empty Hello-World project.
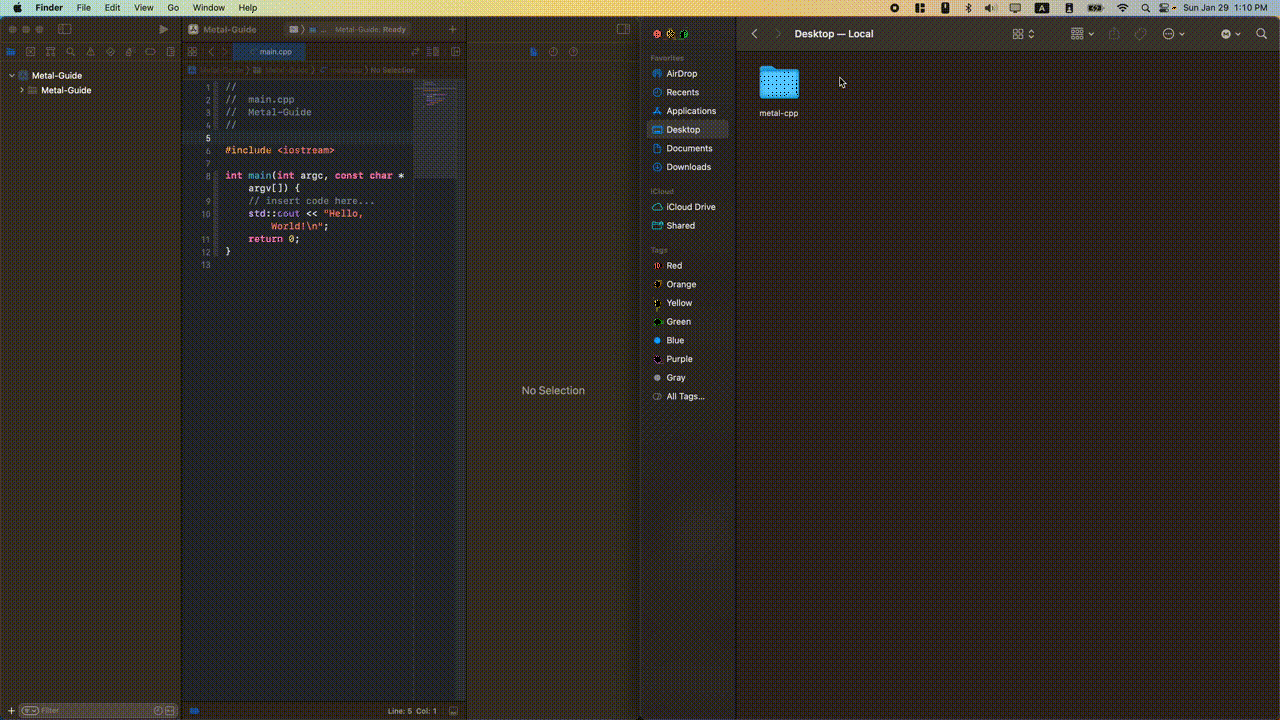
The first thing we want to do is drag and drop our freshly downloaded and unzipped 'metal-cpp' folder into our Xcode project.
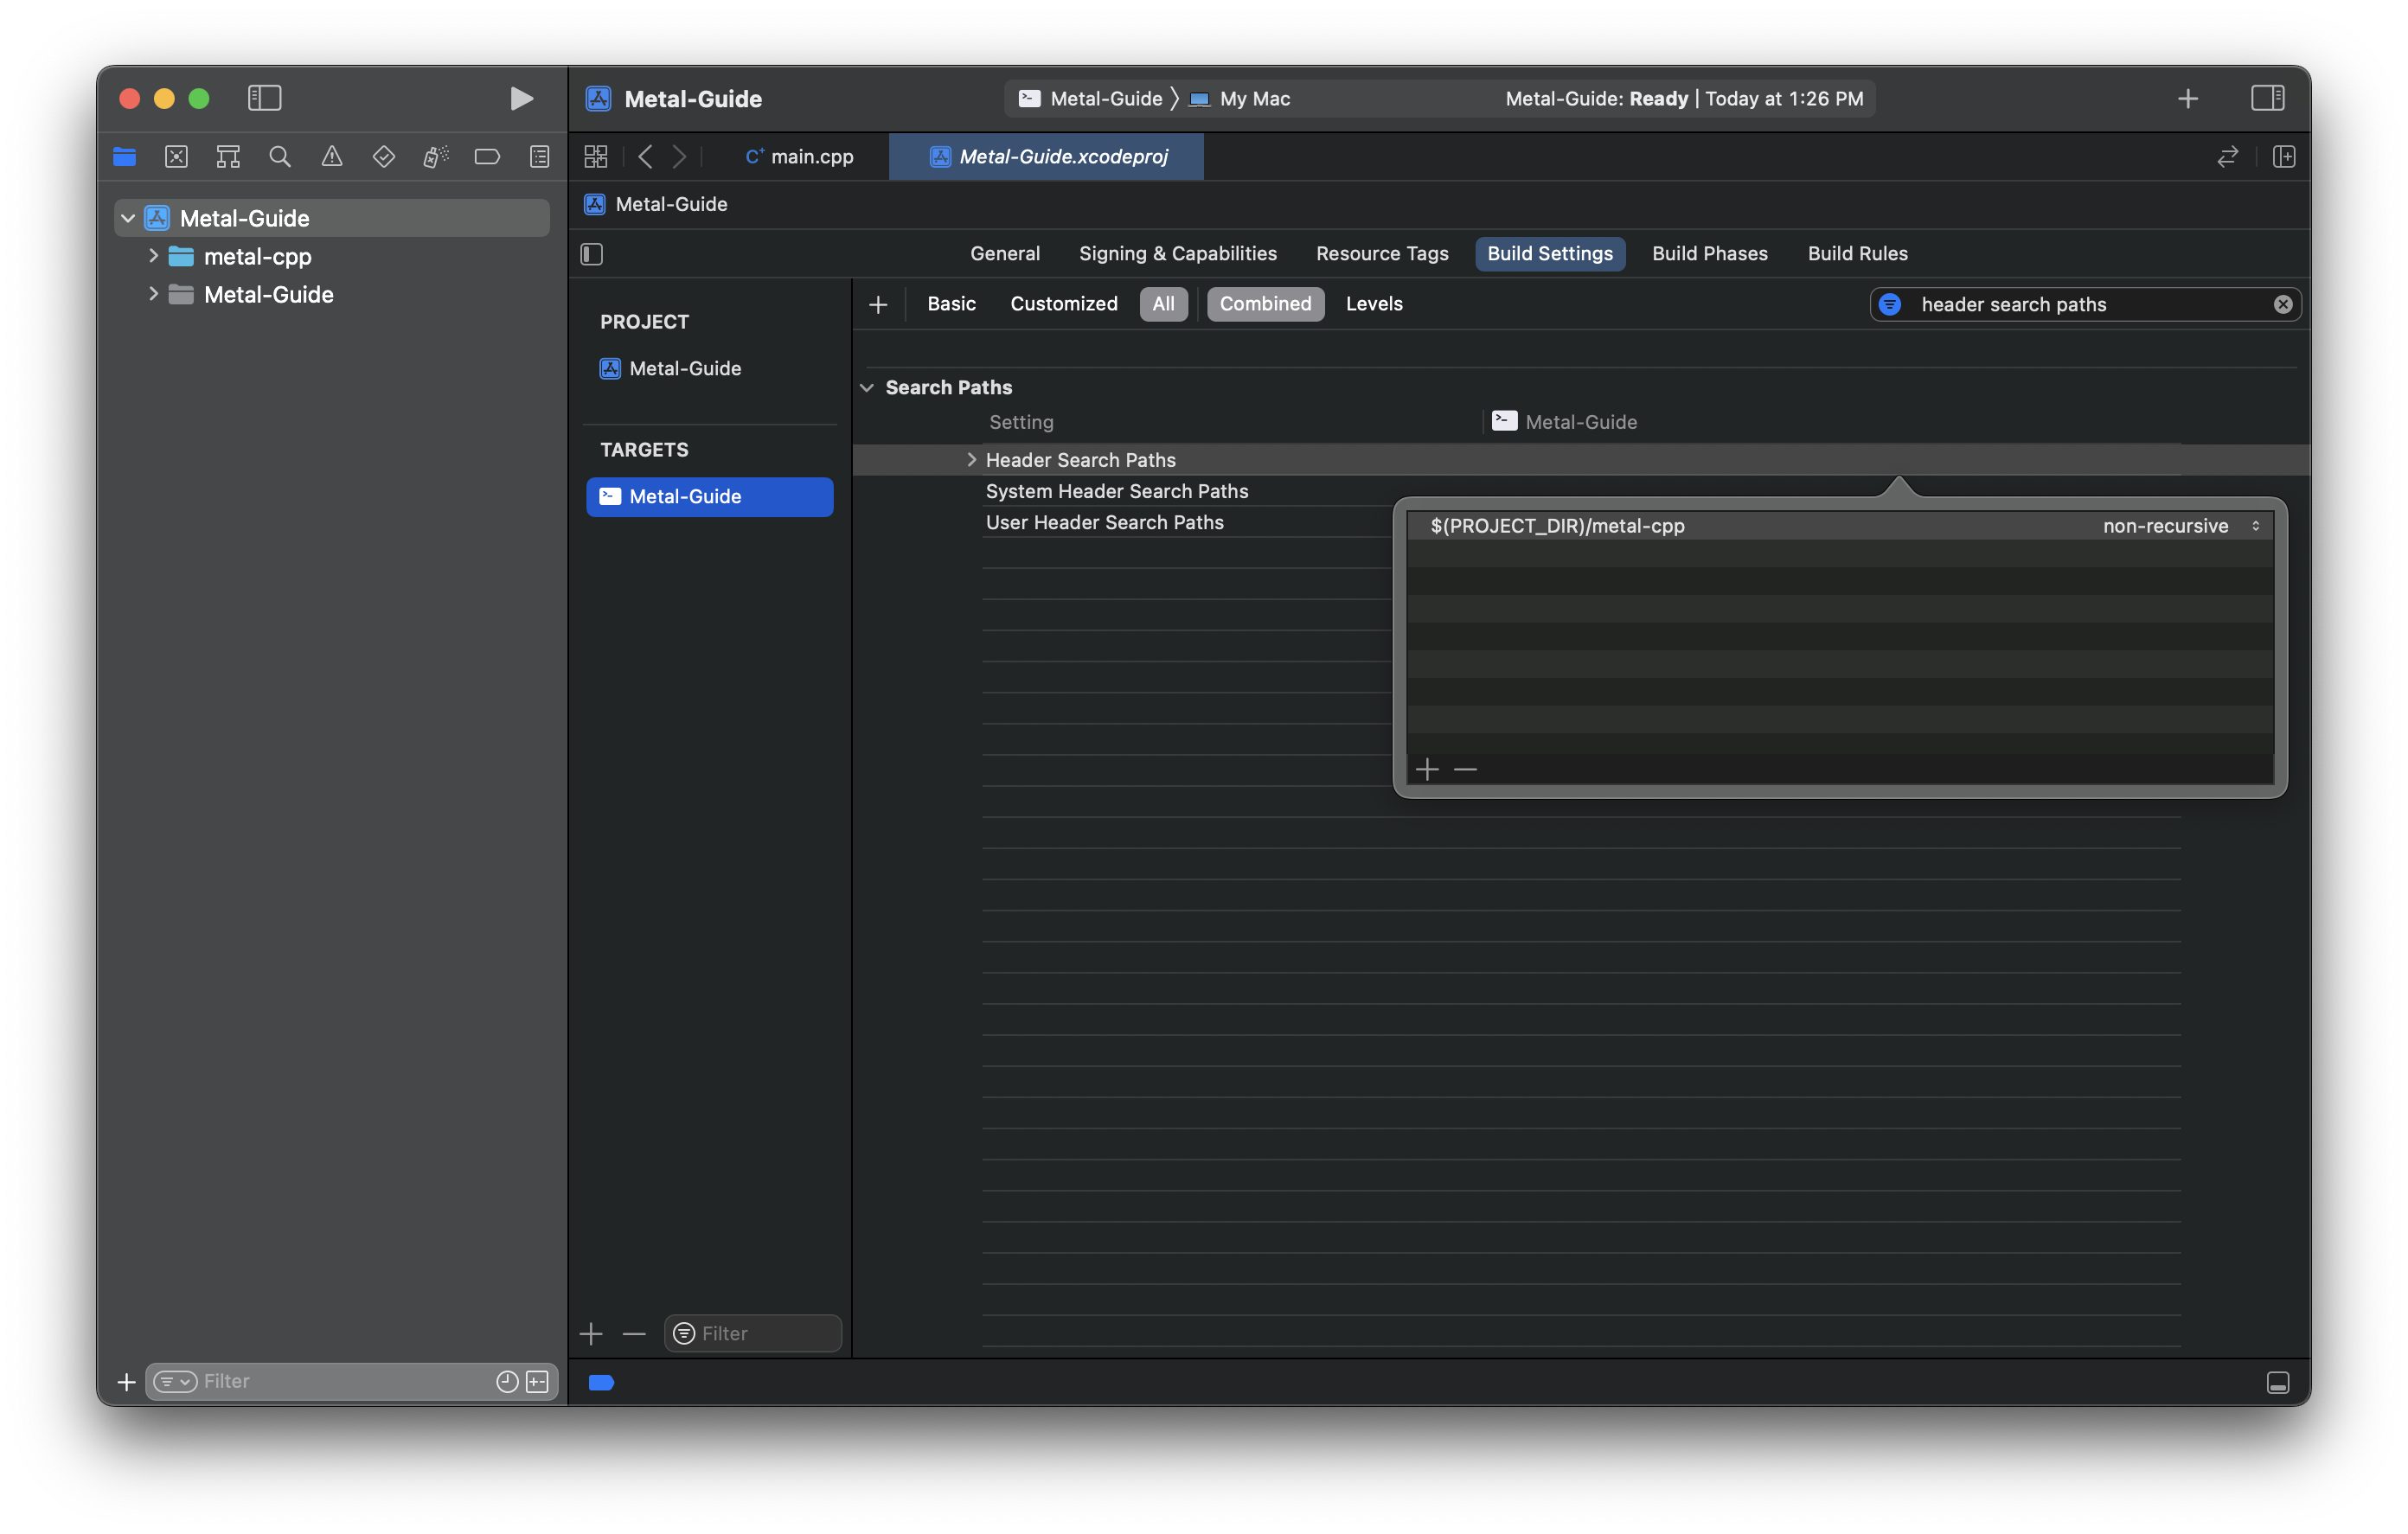
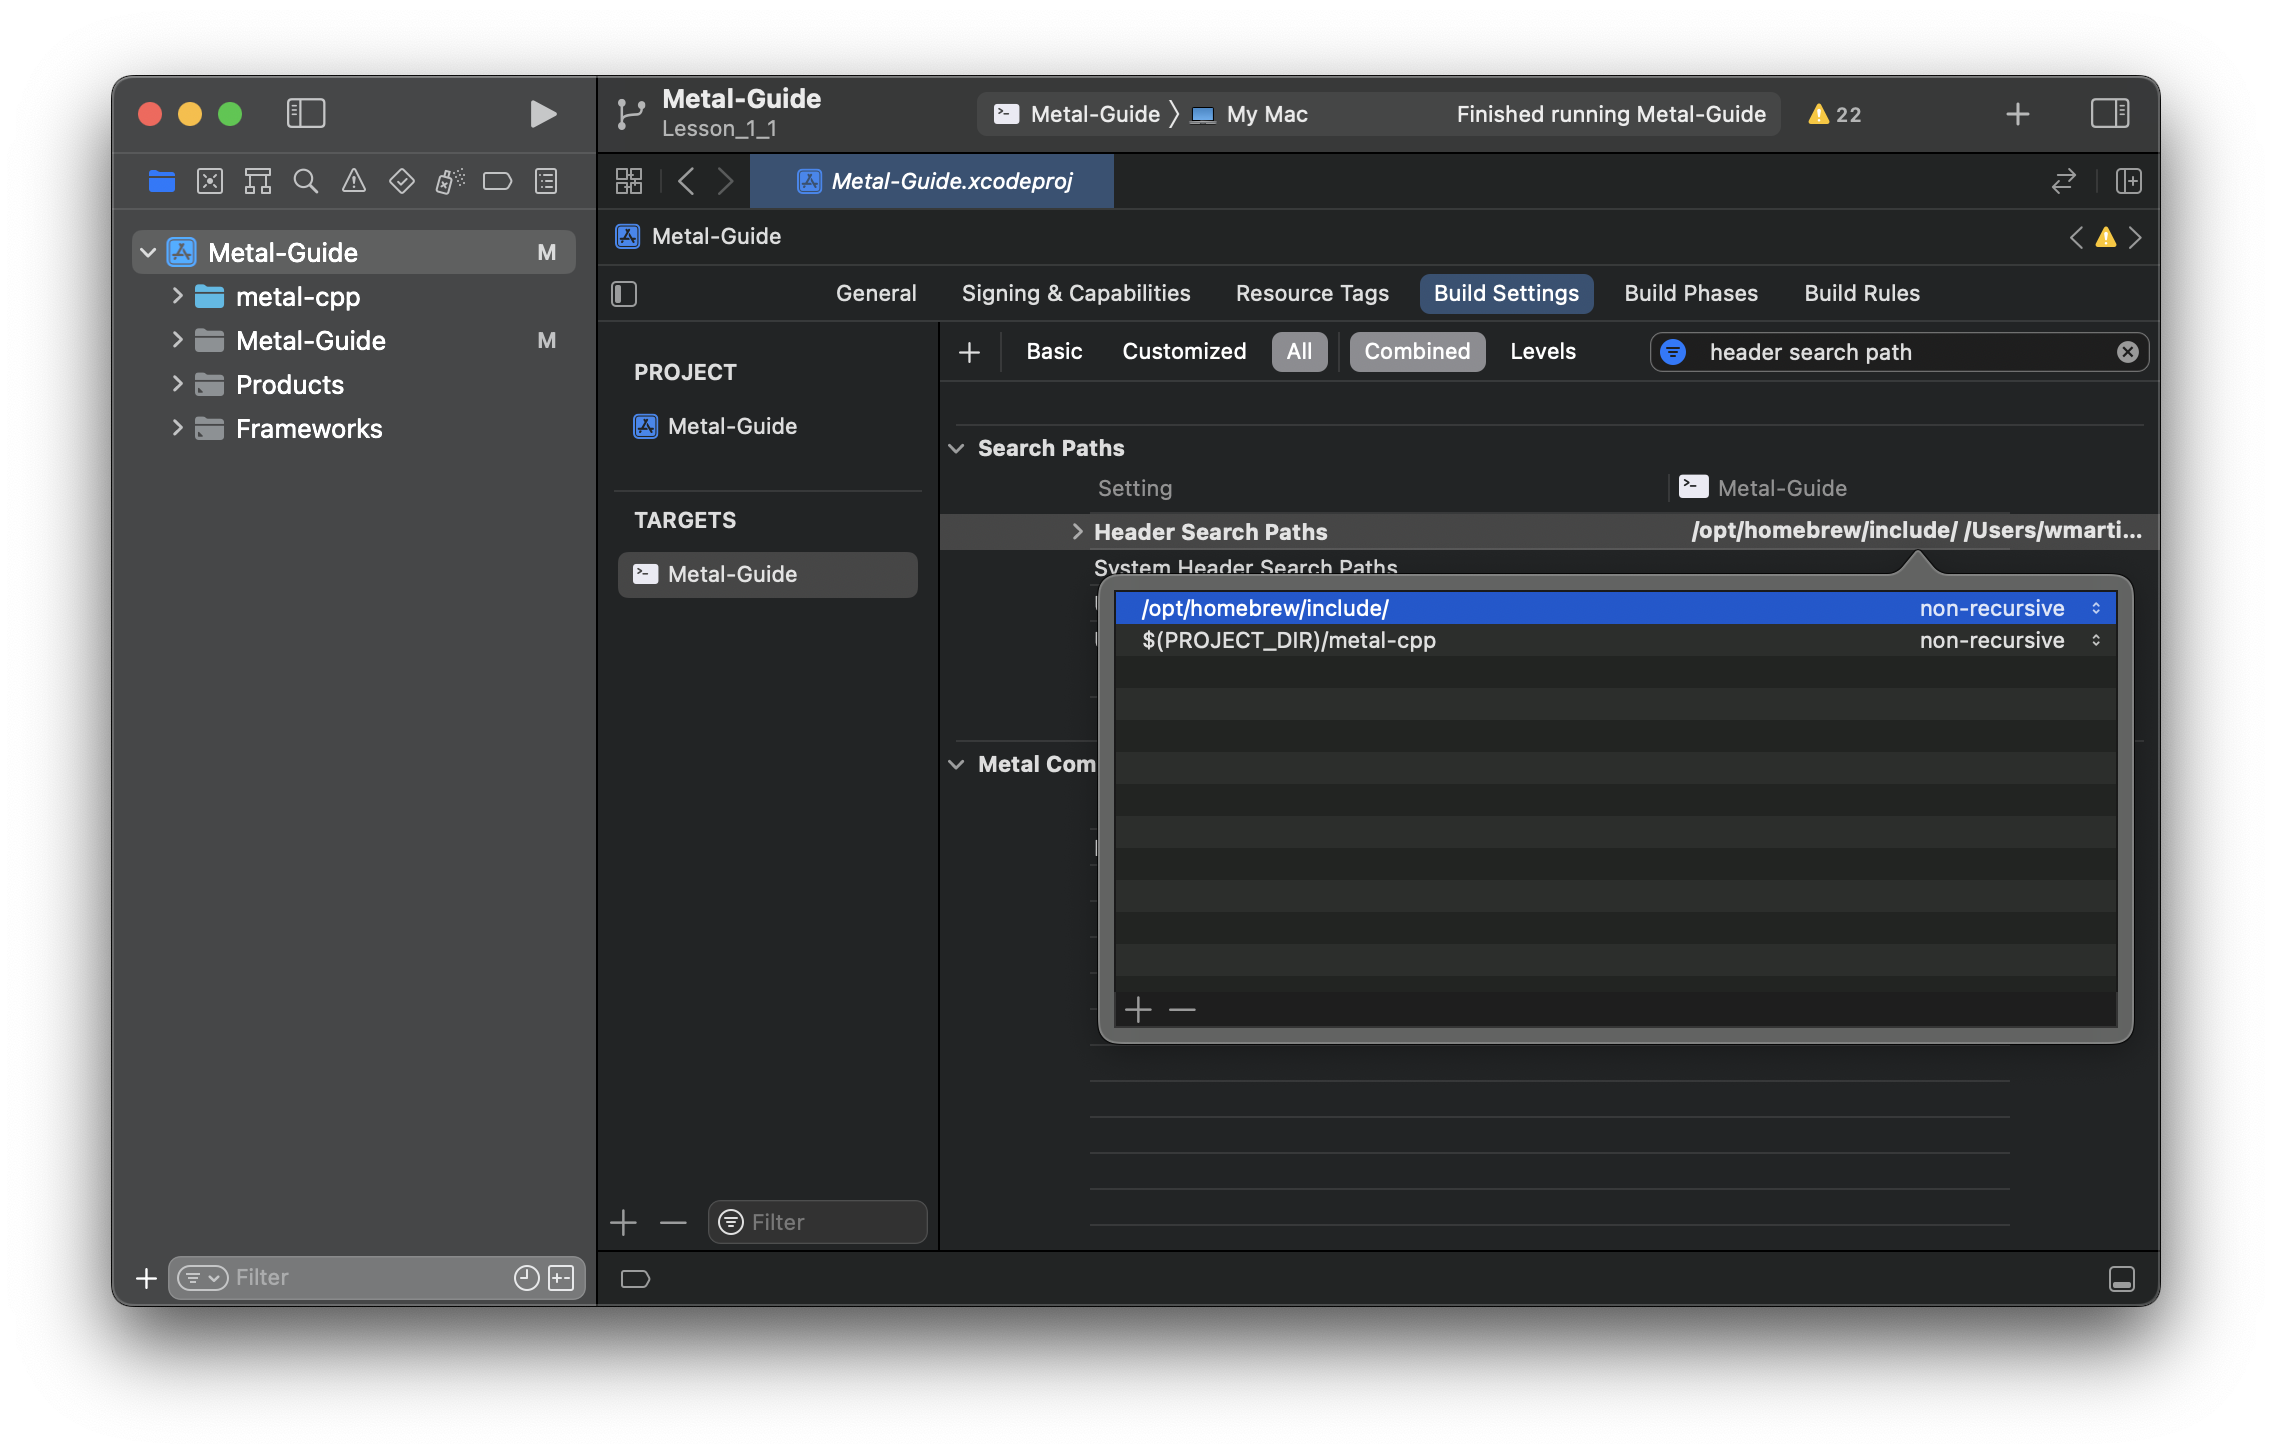
Now that we've got it copied over to our project, we need to make sure Xcode can find it. If we head over to the Build Settings section of our project target, under Search Paths, go ahead and add the metal-cpp folder to your header search paths:
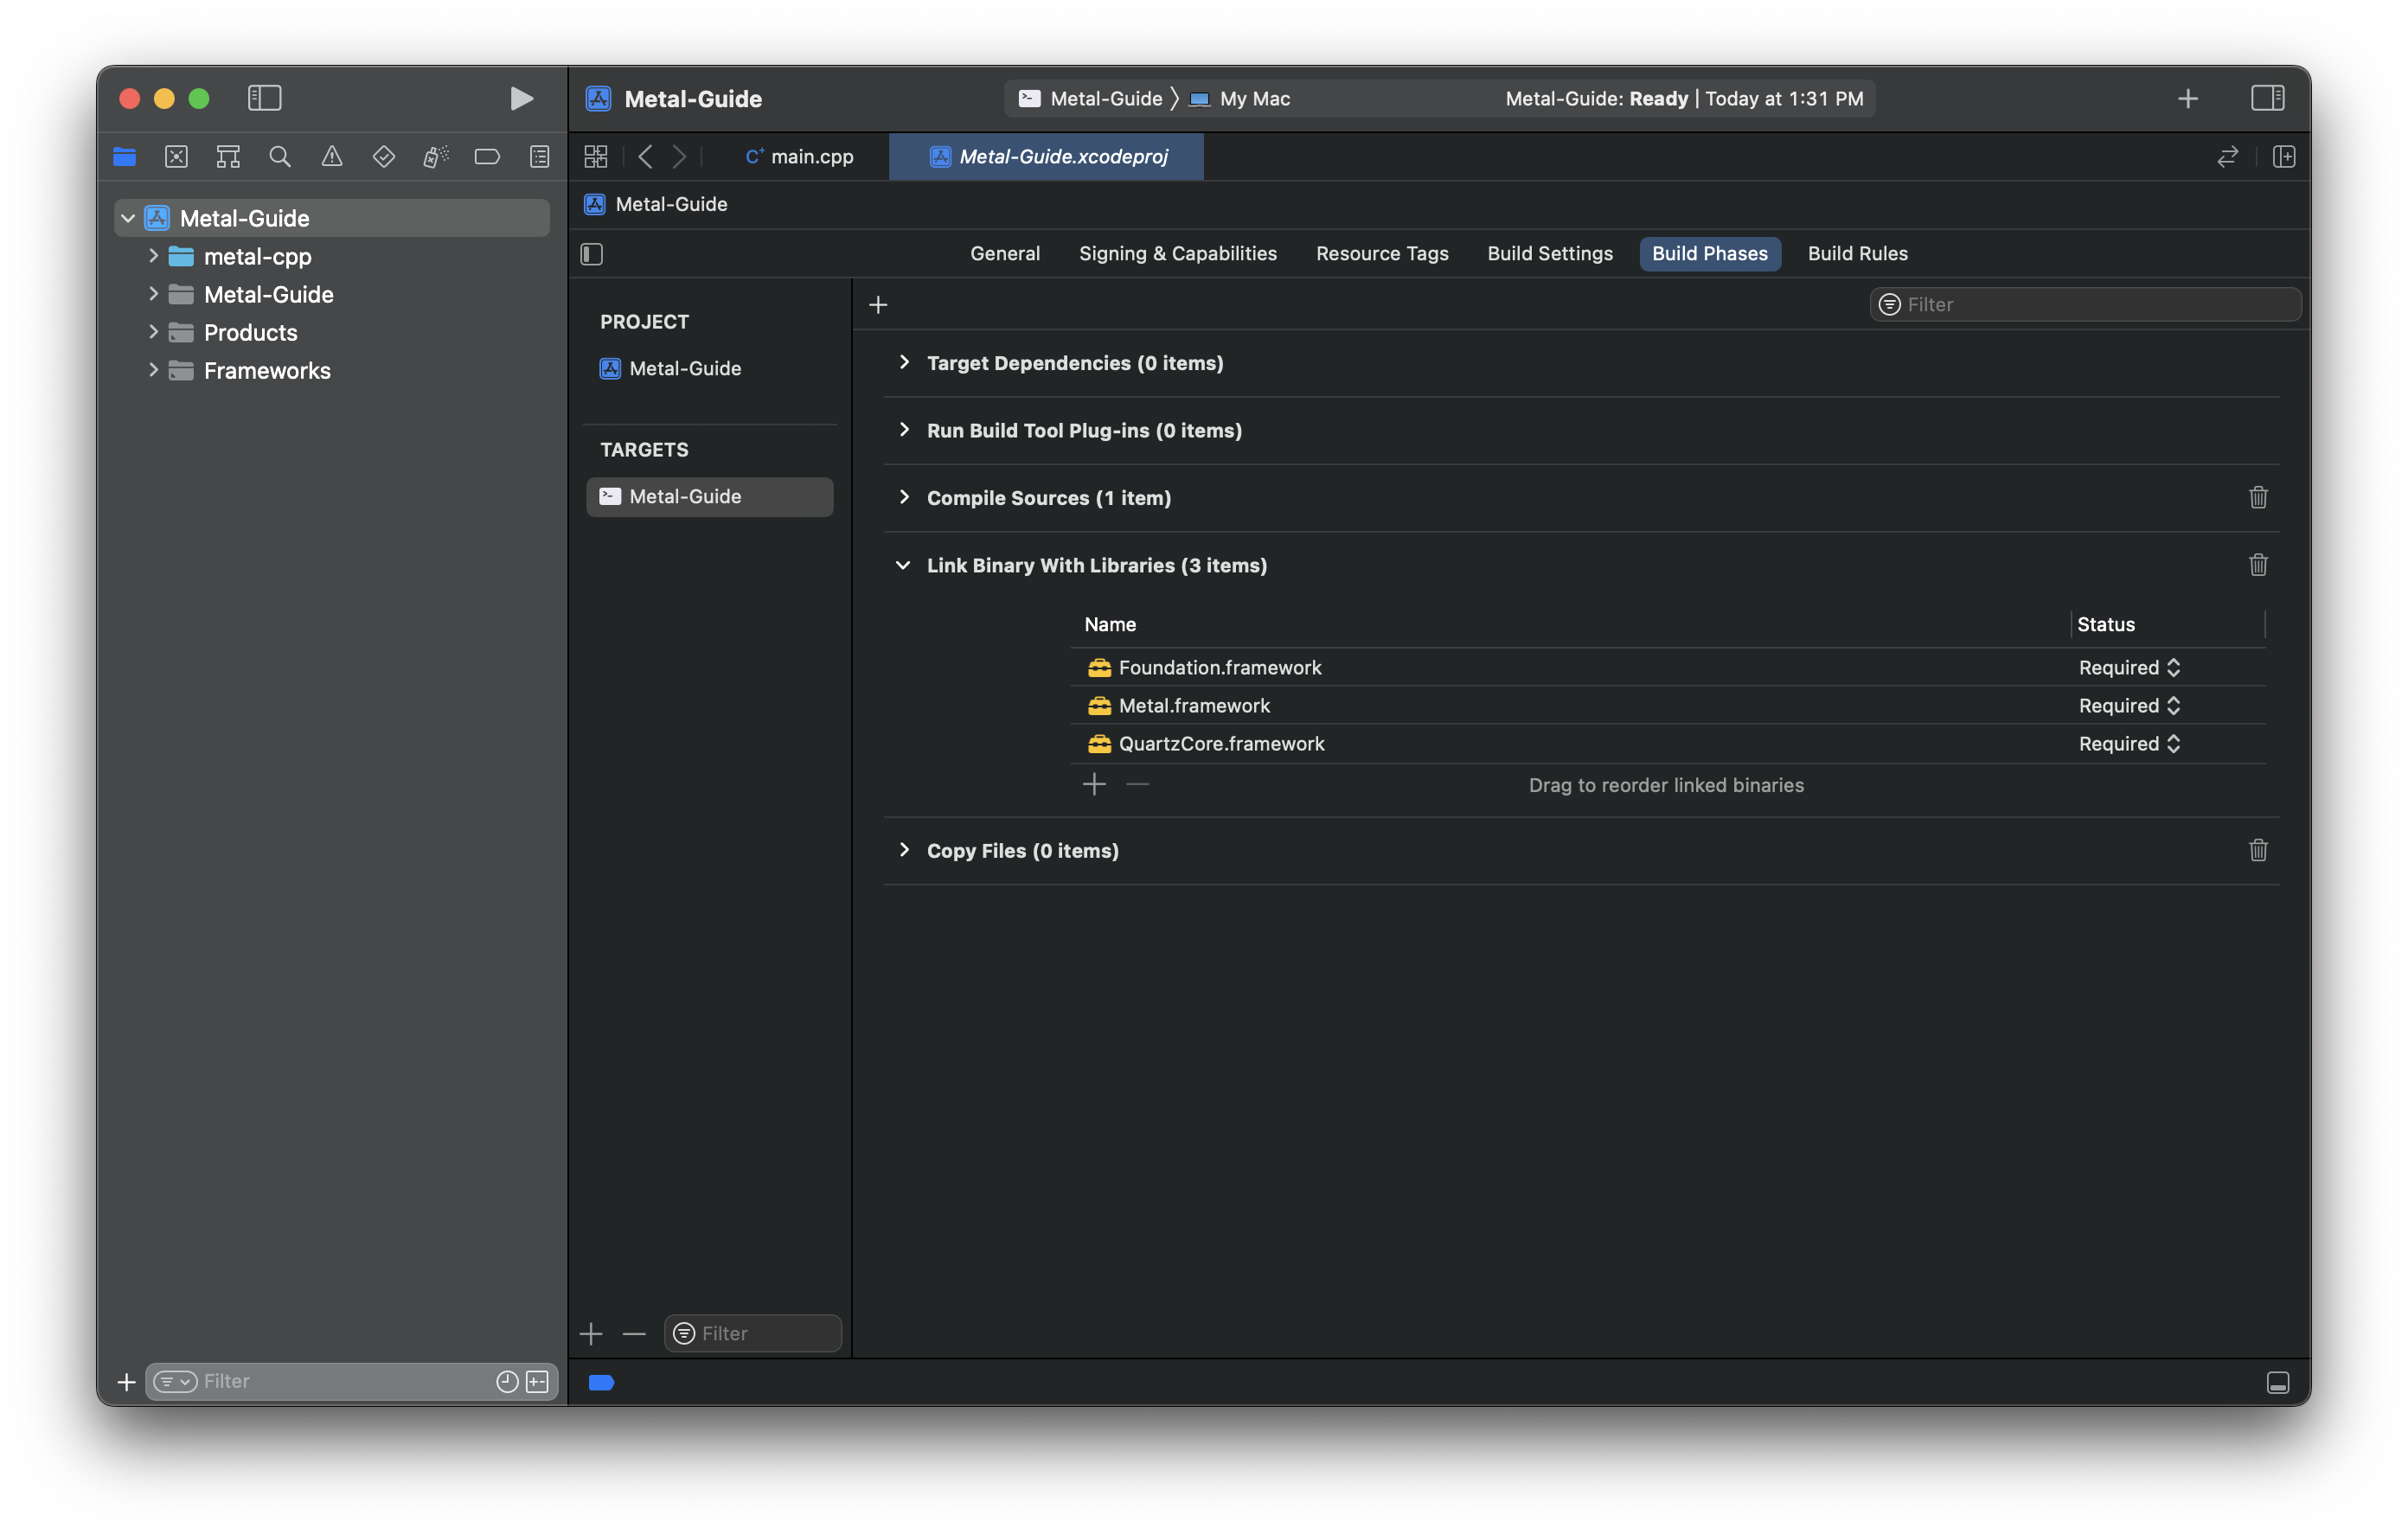
The next thing we should do is link with the necessary Apple frameworks to be able to use Metal. Head over to the Build Phases section, and under Link Binary With Libraries, add these three frameworks:
Now, Metal should be ready to go. Apple's metal-cpp guide tells us that we need to define the metal-cpp implementation in only one of our .cpp files. We're going to create a new file called mtl_implementation.cpp to do this for us, fill it with the necessary define and include statements:
//  mtl_implementation.cpp
#define NS_PRIVATE_IMPLEMENTATION
#define CA_PRIVATE_IMPLEMENTATION
#define MTL_PRIVATE_IMPLEMENTATION
#include <Foundation/Foundation.hpp>
#include <Metal/Metal.hpp>
#include <QuartzCore/QuartzCore.hpp>
Back in our main.cpp file, you add the Metal include, and create a default device:
//  main.cpp
#include <Metal/Metal.hpp>
...
int main() {
    ...
    MTL::Device* device = MTL::CreateSystemDefaultDevice();
    ...
}
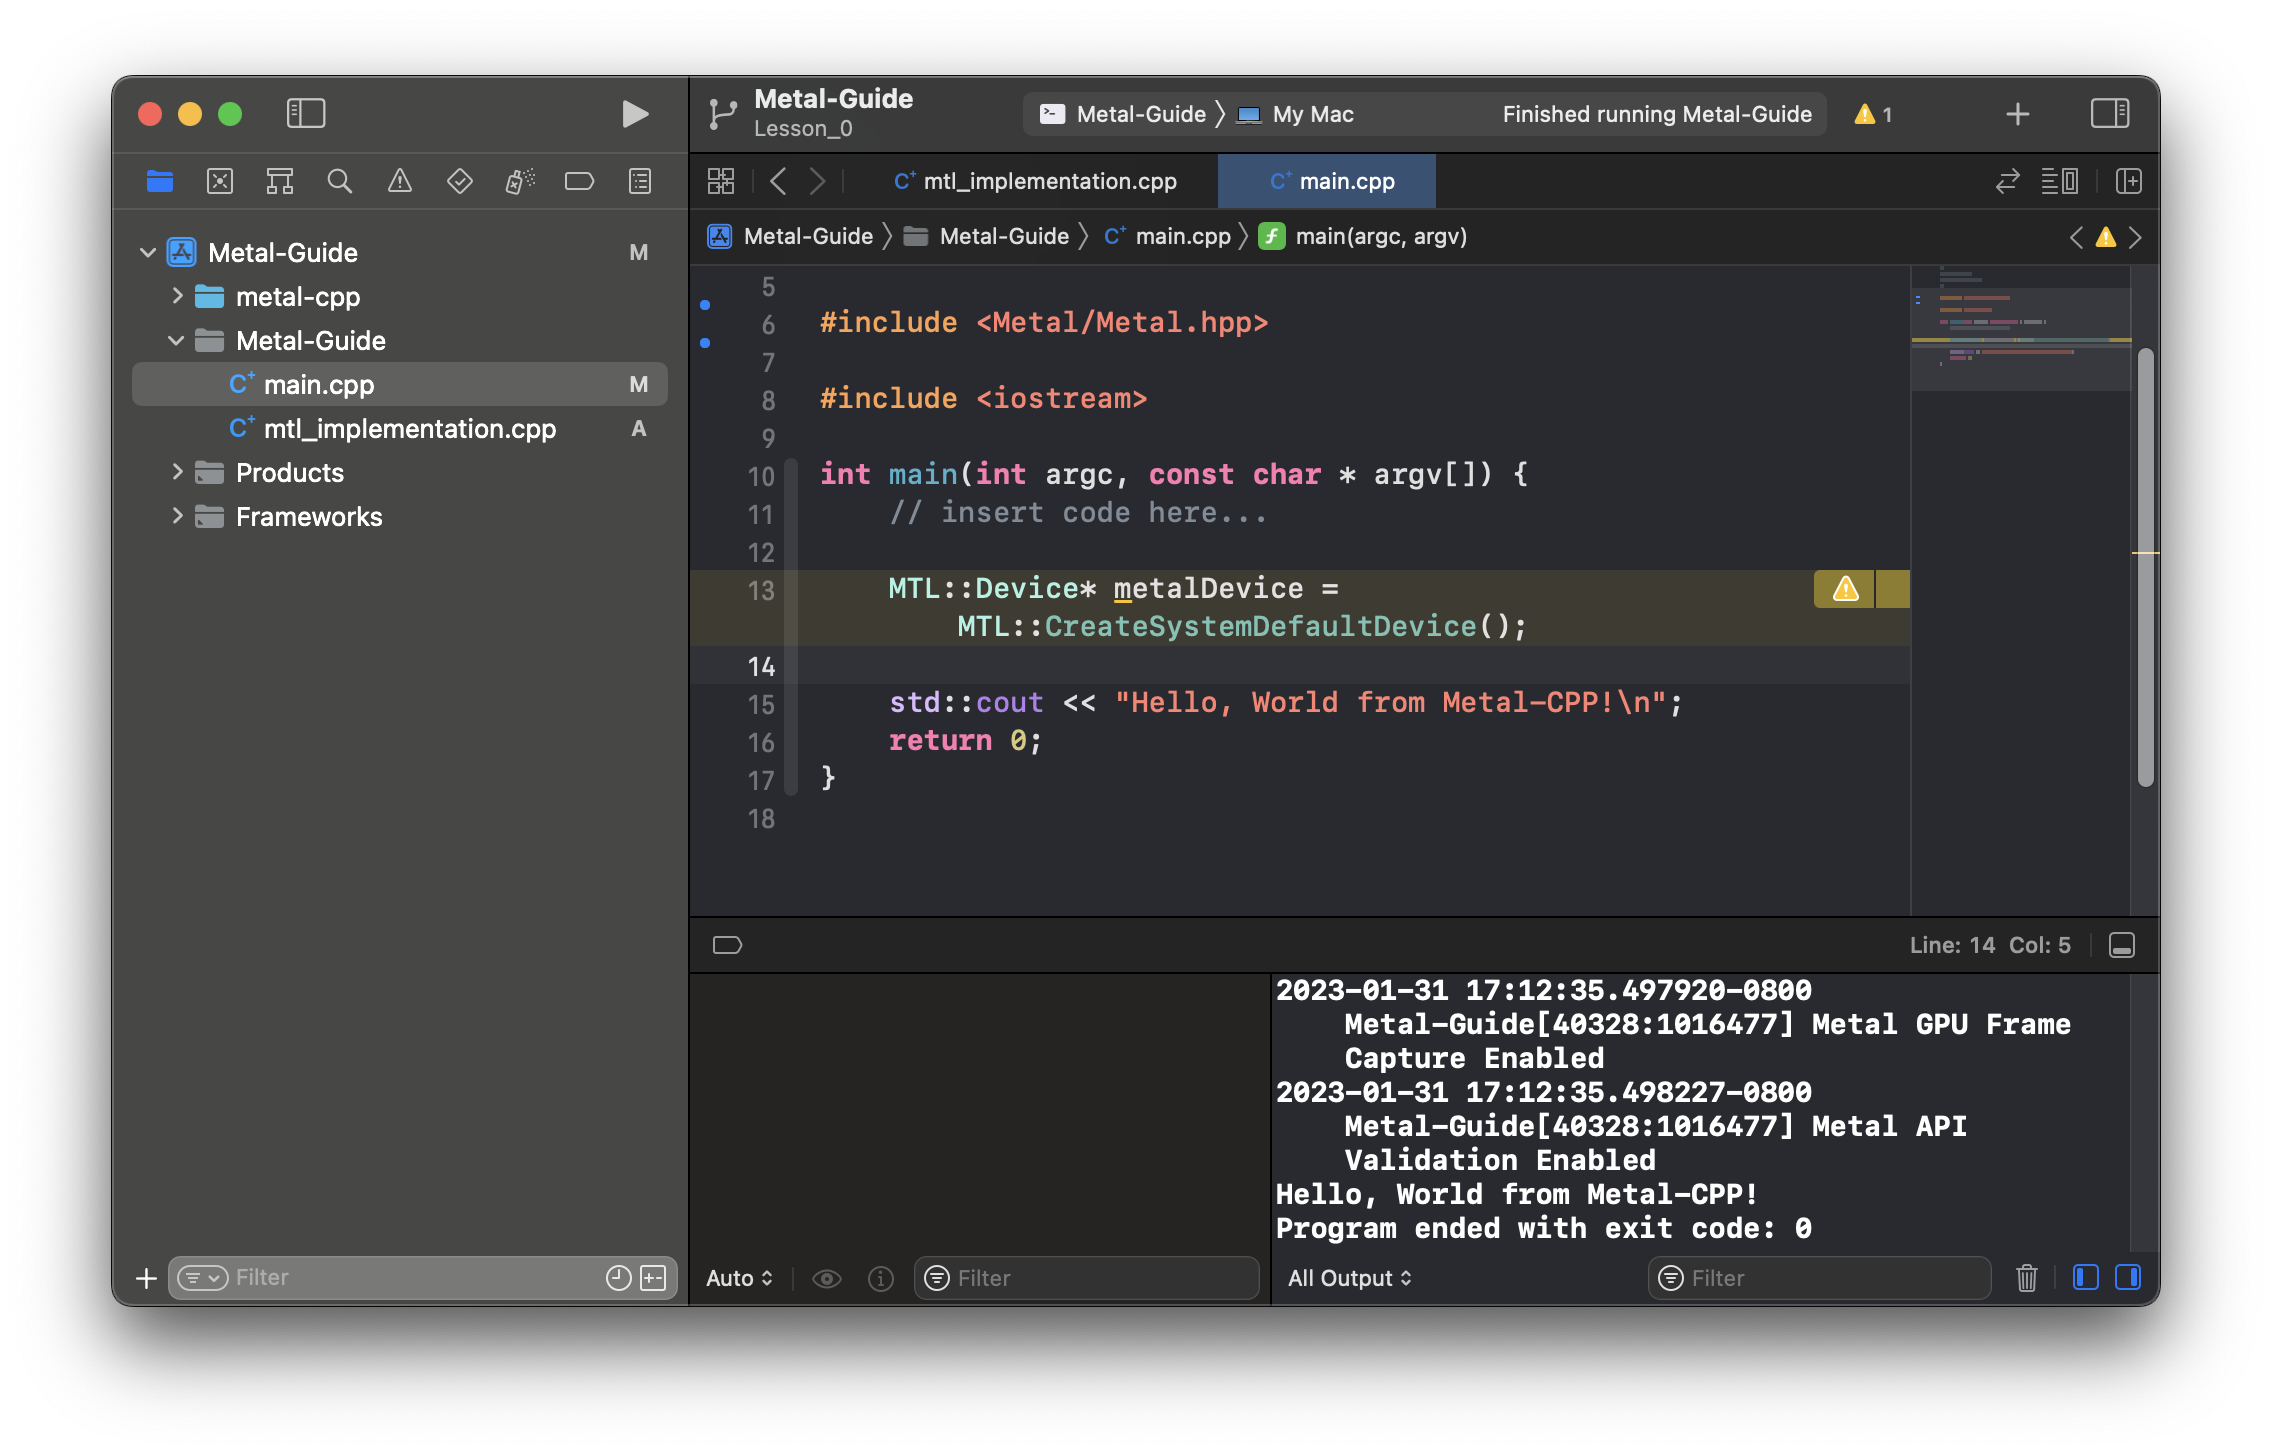
If everything went smoothly, you should see some output in the Xcode console mentioning Metal API Validation and what not. If you don't, make sure you followed all of the steps correctly.
Setting up GLFW for Window Creation
To use the graphics rendering aspect of Metal, we're going to need a window to render our application to. This is where a cross platform windowing library called GLFW comes in. Typically, it's used in conjunction with the OpenGL graphics API, but we can disable this functionality to be able to use it with Metal. In short, it's going to make window creation, as well as keyboard/mouse/controller input handling really easy for us. MacOS has it's own windowing library that's part of the Cocoa framework, but I'm not familiar with how to use it, and we'll able to setup GLFW and get it to expose the part of Cocoa windowing that we will need in about 5 lines of code.
There's a couple of different ways to get GLFW. One way is to download the macOS pre-compiled binaries on the glfw website. This is the way I've set it up on the GitHub repository, starting with Lesson 0. You can head over there and clone that project if you'd like to use GLFW's pre-compiled universal binaries, supported on Intel as well as M1 and later Macs.
Alternatively, you can get it via the brew package manager, which is what I'll show here. If you don't have brew, you can get it here: brew.sh. It's a very useful tool to have for software development on Mac. It's essentially like apt-get on Debian Linux distros, if you're familiar with that.
Once you have brew, you can install glfw with this terminal command:
Now, we need to add brew's headerinclude directory to our Xcode header search path, so Xcode can find GLFW's header files.
If you're not sure what kind of Mac you have, click the logo in the top left of your screen, hit About This Mac and check the Chip type.
If you're on an M1 Mac, like I am, you can add this directory under the Build Settings section for your Xcode target:
Alternatively, if you have an Intel Mac, brew will install packages to the /usr/local directory. Correspondingly, you can use this directory instead:
Next, we're going to link with the glfw dynamic library. Under Build Phases, and under Link Binary With Libraries, click the + icon, Add Other, then Add Files.... It will open up a Finder Window:
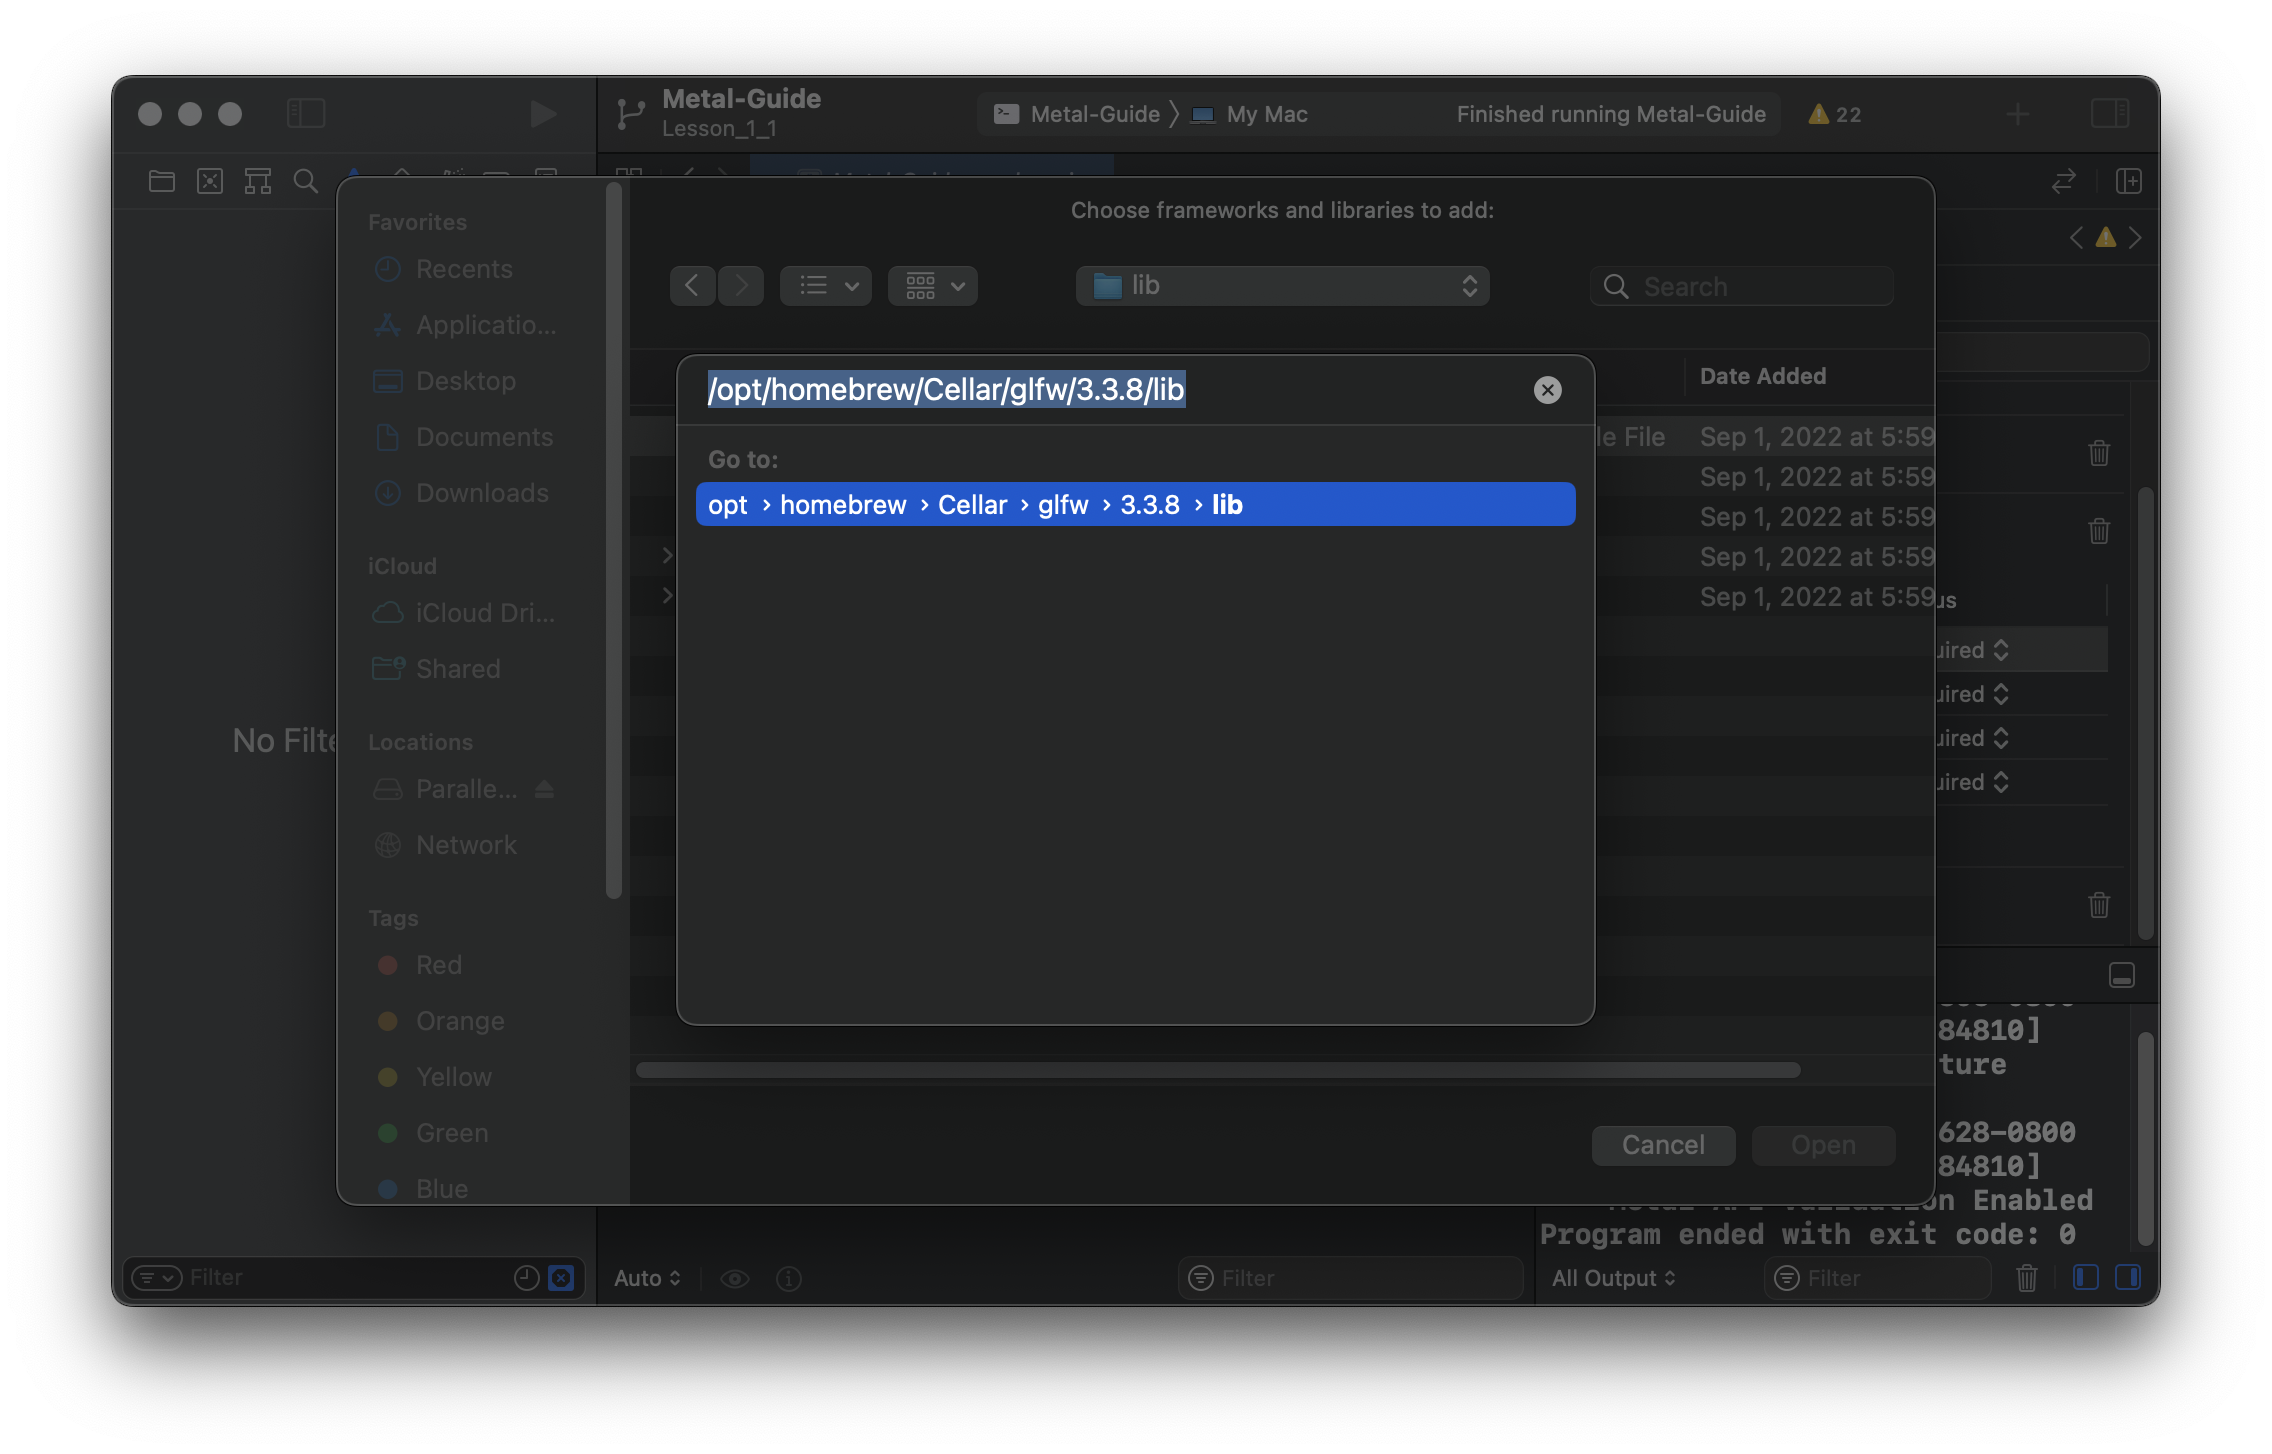
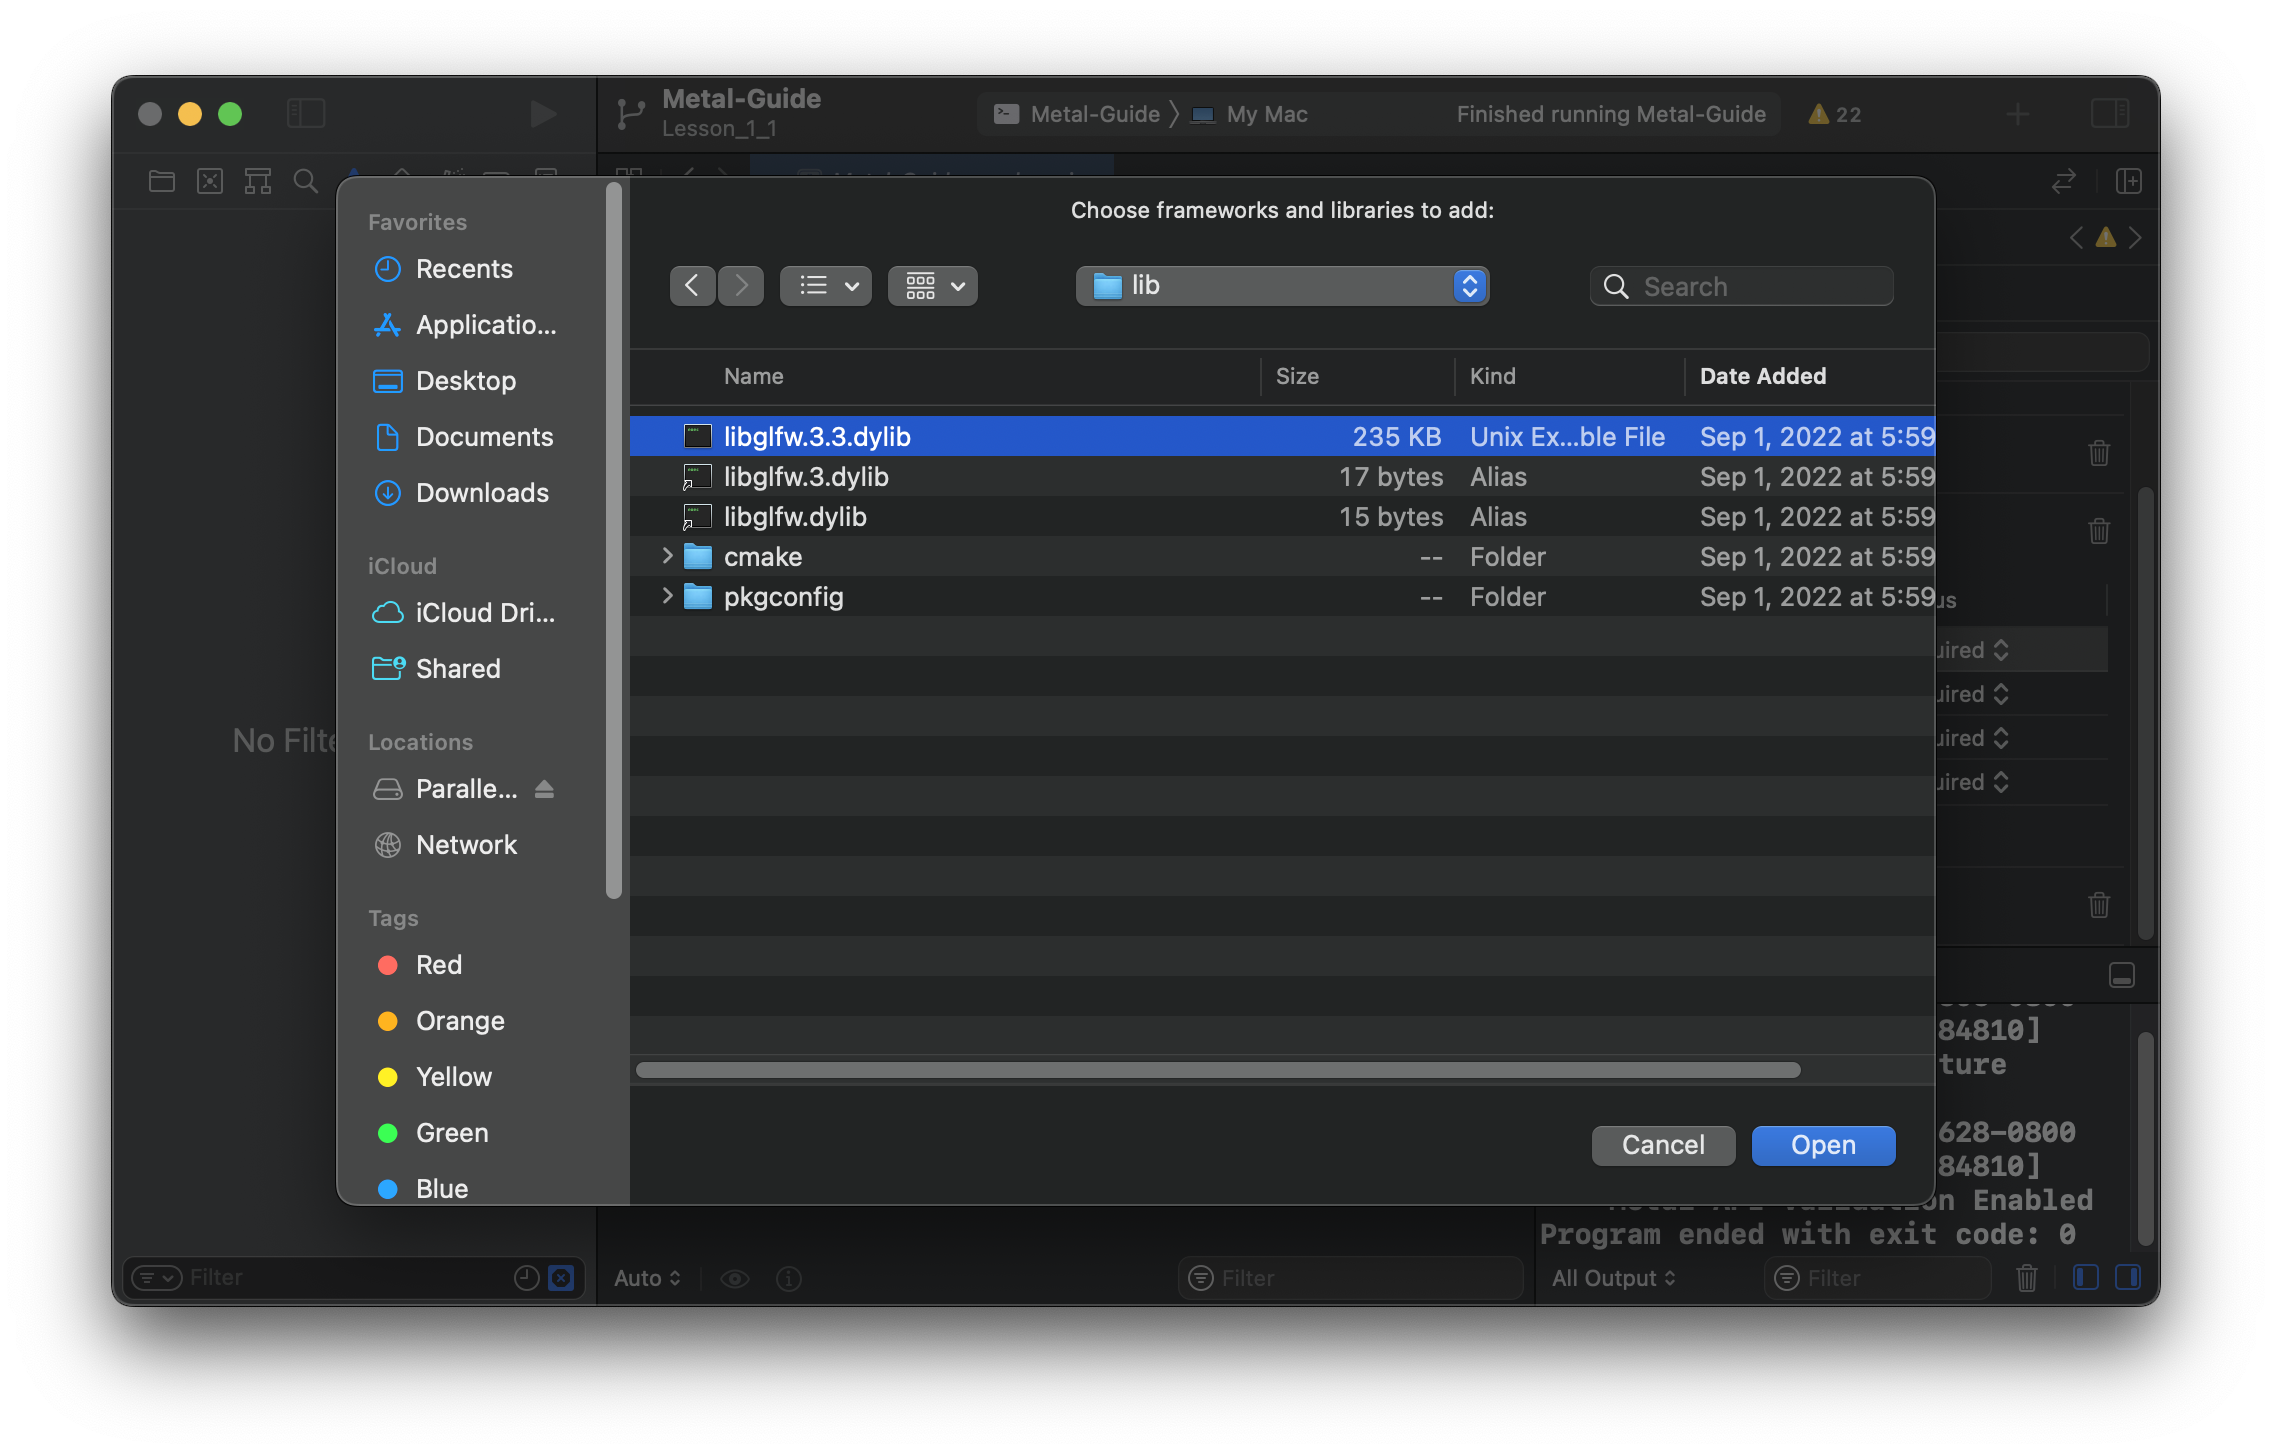
When you have the window open, hold these 3 keys at the same time: Cmd+Shift+G. If on an M1 Mac:
And if on an Intel Mac: Selectlibglfw.3.3.dylib:
And you should be all set to use GLFW!